
Knowing that the garage door is the weak point in a Florida house is not the same as knowing whether yours is one of the bad ones. Doors that look identical from the driveway can differ by a factor of three in what they actually carry, and the difference is written down, usually on a small plate three feet from where you park.
This is the walk-through. Where the label lives, what its numbers mean, how to check them against the state’s own records, how to read a door that has no label, and how to see whether anybody ever set your garage up for storm bracing. Half an hour, a flashlight and a phone covers all of it.
- A rated door carries a permanent manufacturer’s label with the maker, the model or series, and the design pressure in pounds per square foot. Code requires pressure, not wind speed, so a door sold only in miles per hour tells you nothing verifiable.
- The rating belongs to a specific size. A model approved at 9 feet wide is not automatically approved at 16, which is where paperwork quietly stops matching the door on the wall.
- The Florida Product Approval record is free to search and settles the question in minutes. Read the impact field, the design pressure, the limits of use and the installation instructions, not just the FL number.
- A door with no label can still be read. Struts, end stiles, track gauge and bracket count all show whether reinforcement was ever there.
- Bracing leaves traces. Floor sleeves near the jambs and a receiver on the header mean somebody planned for it; a bare slab means the option was never built in.
- Photograph everything you find. The same photos serve a wind mitigation inspector, an insurance renewal and a purchase negotiation.
Start with the label, because everything else is guesswork
Every wind-rated garage door built for the Florida market leaves the factory with a permanent label. It is the one piece of evidence that is both specific to your door and independently checkable, so that is where the half hour starts.
Where it hides and what it has to say
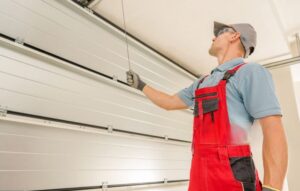
Close the door fully and stand inside. Most labels sit on the inside face of a panel near an end stile, often the bottom or second section, sometimes behind a strut. On some doors it lives on the inside of the track or near the opener bracket. Wipe it with a damp cloth before deciding it is not there, because a decade of garage dust hides a lot.
You should be able to read the manufacturer, the model or series, and a design pressure written as a positive and a negative figure in pounds per square foot. Something like plus 32 and minus 36. Many labels also name the test standard, commonly ANSI/DASMA 108 for pressure, or DASMA 115, ASTM E1886 with E1996, or the Florida standards TAS 201 and 203 where debris impact was part of the testing.
That pair of numbers matters more than people expect. Positive is wind pushing the door in. Negative is suction pulling it out as air accelerates around the corner of the house, and on most residential doors the negative figure is the larger of the two. A door quoted with a single number has been simplified by whoever sold it.
A rating in miles per hour is not a rating
You will meet doors described as good for 130 mph. It sounds reassuring, and it is not something a manufacturer can certify, because design pressure depends on building height, lot exposure, opening size and where the door sits relative to the corner of the house. Two identical doors a mile apart can face meaningfully different loads. When an agent, a previous owner or a salesperson offers a wind speed and nothing else, treat it as an opinion. The pounds per square foot on the label is the fact.
The number belongs to a size, not to a brand
This is what trips up careful people. Doors are tested and approved at defined maximum widths and heights, and the approval says so. A series carrying a strong rating at 8 feet by 7 may carry a weaker one at 16 by 8, or may not be approved at that size at all.
So read the label with a tape measure in hand. Measure the opening rather than the door and write both figures down. If your opening is 16 feet wide and the approval tops out at 10, you have a mismatch that no amount of brand reputation fixes.
Verify the approval so you are reading a record, not a sticker
A label is a claim. The state keeps the file behind it, that file is public, and checking costs a few minutes. This is the step almost nobody takes, and the one that turns a guess into an answer.
Running the search
Go to floridabuilding.org and open the product approval search. Choose exterior doors as the category and sectional exterior door assemblies as the subcategory, then enter the manufacturer from your label. You get a list of FL numbers with model descriptions attached. Find the entry matching your model.
Each approval opens into a record with documentation attached as PDFs — the evaluation report, the drawings, the installation instructions. Download them. They are the only version of the truth that does not depend on somebody’s memory.
The four fields that decide it
Design pressure first. Compare the approved figures against what your address needs, which your county building department or a contractor can give you from the wind speed and exposure for your lot. Impact resistance second, and it is a separate yes or no in the record. Plenty of doors carry a respectable pressure rating and no impact rating at all. Along the Sarasota and Charlotte coast, where most addresses sit inside the wind-borne debris region, that gap decides whether the door is opened by somebody else’s roof tile.
Limits of use third. This lists maximum width and height, whether glazing is covered, whether the approval applies in the high-velocity zone, and any conditions attached. It is short, and the qualifications live there.
Installation instructions fourth, and this is the document that gets ignored. It specifies fastener type and length, spacing, what the jamb must be made of, how many track brackets the door needs and how the header is attached. A door meeting every other line of the approval but anchored the wrong way is not a rated installation. It is a rated product hung badly, and it performs like the anchors.
When the paperwork exists but the door does not match
Compare the drawings with what is on your wall. Count the struts in the drawing and count them on the door. Check hinges per section and jamb brackets down each side. See whether the drawing shows a center post for a double opening and whether that post exists in your garage.
Doors get modified. Panels replaced after a backing incident, a strut removed to clear a new opener bracket, a section from another model fitted because it was what the truck had. Each of those quietly disconnects the door from its paperwork, and the paperwork is what an inspector or an adjuster reads.
Reading a door that has no label at all
If a proper search turned up nothing, that is an answer rather than a dead end. Doors installed before Florida’s statewide code took effect in 2002 essentially never carried a wind label, and plenty fitted since as replacements were never rated either. The door still tells you a great deal about itself.
Struts and end stiles
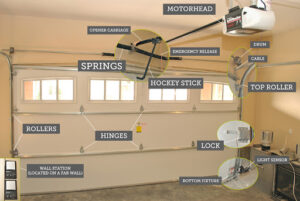
Struts are the horizontal steel channels running the full width of each section on the inside face. A wind-rated double door usually carries reinforcement across most or all sections, often four to six. A builder-grade door has one on the top section where the opener arm attaches and nothing else.
Then look at the vertical steel at each end of every section, the end stiles. On a rated door these are heavier and deeper, tied into the hinge and roller carriers so they resist twisting. On a light door they are thin folded steel. Under pressure a weak end stile rotates, the roller comes with it, and the door leaves the track from the edge inward. That is the most common way a garage door fails, and it is visible on a calm afternoon.
Track, brackets and the jamb behind them
Push the vertical track sideways with the flat of your hand. It should feel like part of the building. If it flexes, either the bracket spacing or the anchoring is light.
Count the brackets holding each vertical track to the jamb. Two or three per side is standard; a wind-rated installation usually has more, with heavier stampings and larger fasteners. Then look at what those fasteners go into. Wood jamb over block is normal here, so check for splitting around the screws, rust bleeding from the holes, or a screw that turns without tightening. In salt air a jamb can look sound and be soft where it counts.
While you are down there, look at the bottom bracket. It holds the lifting cable and takes real load. On a reinforced door it is a substantial stamping with several fasteners; a thin bracket with two screws belongs to a light assembly.
Condition counts as much as construction. Panels that rattle in their hinges, a bottom seal gone hard, corrosion at the bottom section, cable strands broken near the drums, a section straightened after a vehicle hit it — each one puts the door’s real capacity below anything printed on it.
Expert note from the Deluxe Garage Doors technicians
The fastest tell we use is the second section up from the floor. Push the middle of it with a flat hand while the door is closed. On a reinforced door it barely gives. On an unreinforced one you feel the panel dish under your palm, and that same motion is what wind does across the whole face at once, only harder and for hours. The second tell is sound. Run the door up and down and listen at the jambs. A crisp, even rumble means the track is tight to the wall. A knock or shudder at one point in the travel usually means a bracket has worked loose, and a loose bracket in August is a missing bracket in October.
Whether storm bracing was ever provided for
Bracing is a separate question from the door, and the one most homeowners have never looked at. A vertical brace carries load from the middle of the door down into the slab and up into the header, and it only works if the anchor points exist. Those points get installed once, and they leave marks.
Look at the floor first
Stand inside the closed door and look at the slab right behind it, a few inches in from each jamb and, on a double door, near the middle. You want a metal sleeve or a threaded insert set flush into the concrete, often with a cap or plastic plug in it. Sweep the dust away, because they sit level with the floor and vanish under a season of grit.
If they are there, somebody bought a brace system and anchored it properly. If the slab is bare, the option was never built in. Adding it later is straightforward for a technician with the right anchors, but it is work, and not something to discover the day a cone appears on the screen.
The header and the door itself
Look up at the framing above the opening for a receiver bracket, plate or socket a brace post would seat into. It is usually a flat steel piece lagged into the header, offset so the top section clears it as the door travels. Then check the end stiles and hinge line for brackets that do not appear to do anything. A brace resisting both inward and outward pressure attaches to the door as well as to the floor and header, and those points often stay in place year-round. If you find them, the posts are probably in the attic, the shed, or the previous owner’s garage.
What a brace can and cannot do
A brace reduces deflection and makes it far less likely the door leaves its track. It does not make panels impact resistant, and it does not turn an unrated door into a rated one on any form an insurer reads.
Two points get missed. A brace resisting only inward pressure leaves the door exposed to suction, which on most residential openings is the larger load, so a system anchored to the door beats one merely propped against it. And reinforcement adds weight, which throws off spring balance. If the door no longer holds position when you disconnect the opener and lift it halfway by hand, the springs need adjusting, and that is work for someone with the right tools.
The paperwork side, which is where the money is
Everything above produces evidence, and evidence is what insurers price and buyers negotiate against. The last part is putting it somewhere useful.
What a wind mitigation inspector needs to see
The inspection form was rewritten this spring and leans much harder on documentation than on an inspector’s judgment. Photographs and approval paperwork carry the weight now, so make it easy. A clear photo of the label with the numbers legible, the FL number written down, the approval PDFs saved, and the door clean enough that struts and brackets photograph well. Opening protection is recorded at the level of the weakest opening on the house, so an unreadable label can cost you the same credit as a genuinely bad door.
What to check before you close on a house
Ask the seller for the FL number and any installation paperwork before your inspection period ends. If they have none, run the search yourself from the label, and if there is no label, treat the door as unrated and price it accordingly. Two extra checks earn their time. Pull the property’s permit history from the county building department and see whether a garage door permit was ever issued, because a door replaced without one is a door nobody inspected. And if the seller has a wind mitigation report, read the opening protection section rather than the summary. A four-point inspection will not tell you any of this, since the garage door is not in it.
Renewing a policy without losing a credit you already have
A wind mitigation form is good for five years and insurers are not obliged to remind you when yours lapses, so note the date somewhere you will see it. If anything has been replaced or upgraded since the last inspection, order a new form and send it in, because credits are not applied retroactively. And if you are shopping carriers, having the label photo and approval documents in one folder shortens a conversation that otherwise becomes a scheduling problem.
Turning what you found into a decision
By now you know which of three situations you are in. If the door is rated and the paperwork matches, protect that — service it annually before the season, rinse tracks and hardware if you are near salt water, keep the label legible, and have the anchoring checked every few years, because fasteners in a coastal jamb do not stay as tight as they were on day one. The other two situations need more.
The door is rated but something does not line up
A mismatch between drawings and door, a size beyond the approval, missing struts, a light bracket count, a jamb that will not hold a screw — none of these mean automatic replacement. Several are correctable. Struts can be added, brackets doubled, jambs reinforced and anchored properly into the block behind them. What you need is somebody to read the installation instructions against your actual opening and tell you which list you are on. That is a diagnosis, not a sales call.
There is no rating and no label
Then it becomes a question of budget and timing rather than diagnosis. A wind-rated replacement solves pressure. An impact-rated replacement solves pressure and debris, and it is the only version that counts as a protected opening on your insurance paperwork. Bracing buys time if replacement genuinely has to wait. Whatever you choose, order early — rated doors are built to your opening’s dimensions and permits take review time, so the gap between deciding and being protected is measured in weeks.
If you reach the label and it is painted over, or you find the approval and cannot tell whether your opening size is covered, that is the call we take all season. We come out, read the door, measure the opening, check the anchoring and the jamb, look for bracing provisions, and say plainly whether you have a problem. If the answer is that your door is fine, that is the answer you get. Our garage door services cover Englewood, Venice, North Port, Port Charlotte, Punta Gorda, Rotonda West, Placida and Sarasota County, and a free assessment takes about as long as reading this article.
FAQ
- My label is painted over from a previous repaint. Can it be replaced?
- Sometimes. If the manufacturer and any part of the model or serial data are still readable, that maker’s technical department can often confirm the specification and issue a certification letter, which inspectors generally accept. If the original installer is still in business, their order record may hold the same data. Where nothing survives, the door is treated as unrated whatever it is, so on a repaint it is worth masking the label.
- Does adding an insulation kit or changing the opener affect the rating?
- Changing the opener does not, as long as nothing structural is drilled or removed to fit it. Insulation kits and decorative overlays can, because they add weight the springs were not sized for and fitting them sometimes means drilling panels or removing a strut. Anything that alters panels, struts or hardware moves the door away from the configuration it was tested in.
- Do I need a permit to add struts or replace one damaged section?
- Rules differ between Sarasota and Charlotte counties and between municipalities, and a single section replacement is usually treated differently from a full door. Call the building department before the work, because an unpermitted change to a rated door can complicate a future wind mitigation form and a claim alike. A licensed contractor normally handles this as part of the job.
- My double opening has a removable center post. Does that count as bracing?
- A center post is part of some approved assemblies, in which case it is required rather than optional and the drawings will show it. If yours has gone missing, the installed configuration no longer matches the approval. If the door was never designed around one, adding a post is not a substitute for a tested brace system, since the loads still have to reach the slab and header through anchors sized to carry them.